So rather than diving head first into attempting to make a quilt cover by buying lots of fabrics and supplies, I decided to make a practice quilt out of materials I already had. After finishing my course at interior design college I have quite a few fabric sample books left over. These are perfect for cutting out little squares of fabric from, just big enough for a quilt. So that is exactly what I did after calculating how many squares I would require for the size of the quilt.
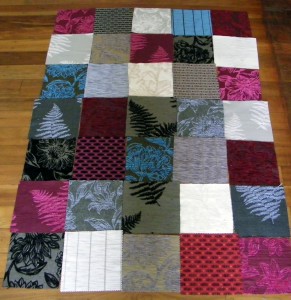
I then arranged the squares of fabric based on the different patterns and colours, experimenting with what looked best together. Here is what it looks like at this point (I did make a couple little adjustments, but this will give you an idea):
Next step was to sew the squares of fabric together into each row and then sew each row together. Once this was done I cut strips for the border pieces and using my machine attached these to each edge of the front of the quilt. I was lucky enough to have some left over fabric from a past project that was the perfect length and colour for the border.
Next I did have to hit the shops and get some material for the backing fabric and some clips for the bottom opening. This was all I actually had to buy for this practice project and my total spend was $6.50. For the backing I spent $4.00 on 1 meter of fabric that was on clearance and $2.50 for the three press stud clips required to secure the opening.
This is where I do have to pause as there is dinner to be made and everyday things to get done, hopefully I will get time to continue sometime this week and finish my practice quilt cover.


